


How to Replace Hoverboard Circuit Boards [FULL Kit]
So you've just receive your hoverboard kit in the mail. That, or you are getting ready to buy replacement hoverboard circuit boards and fix what's probably been broken for awhile now.
Let's get right into it!
Replacing the hoverboard circuit boards is a fairly straightforward task. Replacement involves removing your old circuit boards and installing them with new hoverboard circuit boards.
Table of Contents
How to Remove Hoverboard Circuit Boards
Note: Read this instructions in FULL before removing or installing your new kit.
Step 0
There is a step before beginning to remove your hoverboard circuit boards and that is to open up the hoverboard itself. We've already written a guide on how to open a hoverboard up, so click that link to open these instructions in a new window.
Step 1
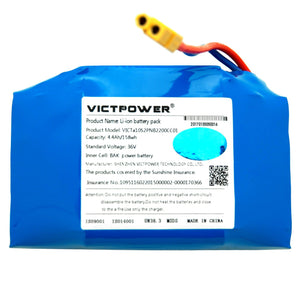
The very first step once you've opened the hoverboard up is to disconnect and remove the battery. Disconnecting it will ensure there is no current running through the boards while you're removing them. Removing the battery will give you extra space to work in future steps.
Once you've disconnected the battery, press the power button and hold it for 10 seconds. This will discharge any lingering built-up electric current in the circuit boards and capacitors and prevent should you from getting unexpectedly shocked.
Step 2
Once the hoverboard has been opened up the next step will be to remove the old circuit boards. The only tools necessary for this are a small Philips screwdriver, your hands, and maybe a pliers. We suggest a needle nose pliers.
Pro Tip: Before proceeding, take some pictures of the circuits to document where all of the wires are located. Pay attention to the colors of the lines that go into other lines. They are usually the same color, but in about 5% of cases they are different colors leading into each other.
Step 3
Now, detach all of the clips. This includes the clips that go to the motors, the battery, and any clips between gyroscopes to the motherboard. Make sure you unclip everything.
Step 4
Once everything is unclipped the next step is to unscrew the circuit boards from the hoverboard. In a 3-pc setup (1 motherboard, 2 gyroscopes) there are 4 screws on each circuit board.
Pro Tip: The motherboard might look like it has a lot of screws. Do not remove all of these. You only need to remove the 4 screws that hold it to the frame.
Step 5
Once you've unscrewed the motherboard and gyroscopes, remove them from the hoverboard.
Step 6 (Optional)
Our hoverboard kits will sometimes include Bluetooth. If your hoverboard includes this, you'll want to remove that and install the new Bluetooth chip.
Step 7 (Optional)
There are normally two sets of LED lights in a hoverboard: the headlights and the center indicator lights. You only need to remove these if the clips from them do not fit into your new kit or aren't compatible for some other reason.
To remove the LED headlights, remove any screws keeping them in place and yank on them to get them out.
To remove the LED indicator lights, you'll need to unscrew the top plastic shell to access them.
There are a bunch of screws keeping the top plastic shell connected to the frame. You'll find these around the edge of the frame. The screws are very small. Unscrew all of them, and don't miss the ones that are hidden between the wheel and frame.
Underneath the top plastic shell you'll find two small LED lights. These are sometimes hot glued in or held in by 1 or 2 screws. You know what to do in either case.
How to Install Hoverboard Circuit Boards
Now that you've removed your old circuit board kit it's time to install the replacement kit you've just bought. Scroll down to the bottom of the page to see a video.
Tools Needed
- Needle Nose Pliers
- Philips Head Screwdriver
- Hot Glue Gun
Step 1
Get your kit and separate the pieces so you know what everything is. If you ordered a 3-pc circuit board kit it will have one motherboard and two gyroscopes. If you ordered a 2-pc circuit board kit it will have 2 gyroscopes and won't include a motherboard piece.
Both of these style kits (if purchased from us) will contain additional circuits including:
- 2 LED Headlights
- 1 Battery Indicator Light
- 1 Activity/Error Indicator Light
- 1 Charging Port
- 1 Power Button
- 1 Bluetooth Chip/Module
- 1 Bluetooth Speaker
- 1 Bluetooth Connecting Cable (varies)
Step 2
We always suggest replacing at least the core 3-pcs or 2pcs from your kit, which are the motherboard and gyroscopes as indicated earlier.
Take the motherboard and gyroscopes and put them into your hoverboard where the original parts were located. The motherboard goes on the side with the power button and charging port. Refer to the pictures you took when removing your original kit.
The gyroscopes should ALWAYS have the side with the single sock facing INWARD toward the middle of the hoverboard. If you have them backwards these hoverboard circuit board replacement kit instructions will not work.
Note: For most applications you can get away with just replacing the motherboard and gyroscopes, leaving original the LED lights, power button, and charging port in place.
If you choose to keep these parts in place, make sure they properly connect into your new kit. If they don't connect for some reason (such as clip size is different or it has a different number of pins) then you must replace those parts too. Do that before moving onto the next step.
Step 3
Screw in the motherboard and gyroscopes.
Step 4
Slide the wires of your motherboard through the center of your hoverboard where there is a hole connecting the sides.
On both sides, connect the motherboard wires to the gyroscope and connect the colored wires of the motherboard to the colored wires of the motors.
Pro Tip: If after you finish the install and the motors are acting funny, you may need to rewire the hoverboard motor wiring combination for it to work.
Step 5
If you're installing the Bluetooth, now is the time to do it. Most Bluetooth modules are glued to the underside of the shell with hot glue. If the wire from the Bluetooth has a matching wire and reaches the new motherboard, just clip it in and you're done.
If not, use a needle nose pliers to remove the old Bluetooth chip and speaker. The hot glue will give and come off cleanly. Take your new Bluetooth chip and speaker set and hot glue them into the same places you just removed the others from.
Connect the Bluetooth cable to the Bluetooth module and motherboard. Your Bluetooth is now connected.
Step 6
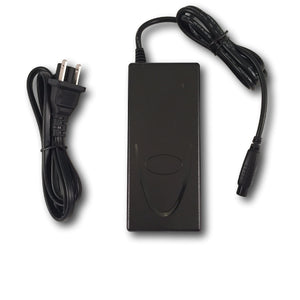
Connect the power button and charging port to the motherboard. The power button is typically 2 wires and always the smaller socket on the motherboard. The charging port is typically a 4-pin/4-wire power cable, a 3-pin/2-wire power cable, or a black 2-pin/2-wire power cable.
Step 7
All circuit boards should be plugged in together now. Put the battery back in and plug it to the yellow clip that you slid through the center channel of the hoverboard earlier. Your hoverboard has power now.
Step 8
Put all the screws back into the shell, turn the hoverboard right side up, and turn the hoverboard on. Everything should be working. If not, you may need to make some adjustments. There could be an unplugged wire, or you may have to make the motor wiring adjustments I mentioned earlier.