


Learn how to install a hoverboard battery with this easy video by Daniel at StreetSaw Hoverboards.
Video Title: How to Install a Replacement Hoverboard Battery in Less than 4 Minutes!
Video Length: 4 Minutes, 11 Seconds
Tools Needed: Philips Head Screwdriver, Replacement Hoverboard Battery
View Full Size on Youtube: How to Install Hoverboard Battery
Read My 35-Page Hoverboard Battery Ultimate Guide
Transcription:
Hey this is Daniel with StreetSaw. I'm just going to show you how to take a battery out and replace it out of any hoverboard. The first thing you want to do is find the side that has the power button and the charger button, and you want to pick the opposite side.
So this one has two holes on it because I've got a fresh case to make it faster, but the opposite side is the one with the battery. So you're going to unscrew all of these, there are 8 screws right here. So if you happen to have a serial number label or something here, just peel it back or peel it off and you can access the screw.
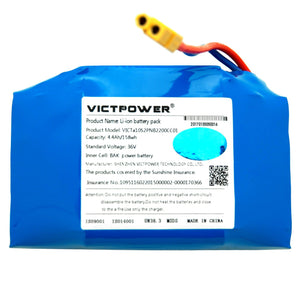
All you need is a Philips head screwdriver. I use a power drill because I do this professionally. Take this off and right here is where you're going to see your battery. This big blue pack here, that is shrink wrap over a bunch of lithium ion battery cells.
What you're going to do is, some of these will have hot glue, some won't. Pull that off, you're going to undo it by pinching this little clasp and pulling it like that. Then you going to go counter-clockwise on these screws here on the battery cage. There's four of them.
Once you get those off, all you have to do is pull the battery cage up, put it to the side. You're either going to have these either strung above or below it. You're going to pull these apart, and you can usually leave these three green ones with the green covers on it, you can usually leave that there. This goes from your motherboard to your motor.
What you're going to do is just slide your battery out. You're going to disconnect it, and when you reconnect it, its actually easies to take your cage here and slide it back in together like this. That is what we are going to do.
Everything here is magnetic so I just pickup my screws from before. Line this battery cage up, turn your screwdriver to clockwise so you can start drilling in, righty tighty lefty loosey as they say. Drill it in like that.
Don't make it too tight. If you make it too tight you're going to break the plastic on the battery cage. Look for your clamps again, and you can plug these in either on top of the cage of below the cage, its all preference. Plug them back in. They only fit one direction, so if it fits, you're good.
After you're done with all that, put the cover back on. You've got the sheet metal screws that go on the outside, and the machine screws that go into the center 5 holes right here.
So basically that's all there is to doing a battery cage. If you need any more help, check out our hoverboard YouTube channel, check out our other videos, or shoot us an email. We can make videos for whatever you need.
Take care!