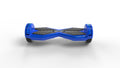


Has your hoverboard stopped working? Are you wondering how to replace hoverboard gyroscope sensors so you can get back on the road? If so, you've found the right page. We are going to show you exactly how to install gyroscopes onto your smart balance wheel.
Estimated Repair Time
- 20 minutes
Tools Required
- Philips Head Screwdriver (or Power Drill)
- Medium cardboard box or styrofoam to set hoverboard onto
How to Replace Hoverboard Gyroscope Sensors
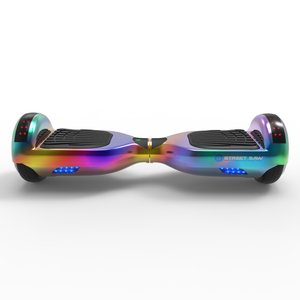
Replacing the gyroscope sensors in your hoverboard is quite easy and there's certainly no reason to be afraid of performing this task. We realize that there are many different models, sizes, and types of hoverboards on the market today. Therefore, we are going to generalize as much as possible to the most popular models.
Step 1
You will want to setup a sturdy surface to work on your hoverboard. We recommend using a medium-sized cardboard box or the styrofoam that came with your hoverboard. Place your hoverboard upside down on the cardboard so the button is facing up toward you.
If you do not have a steady surface like this then the floor will be fine, we just don't want you to scratch up the hoverboard or have it rolling around during repair.
Step 2
After placing your hoverboard upside down on the steady surface you will need a Philips head screwdriver. Some people call this type of screwdriver a cross screwdriver. Take the screwdriver and unscrew all of the screws underneath the side that does NOT have the hoverboard charging port.
Pro Tip: Once you've unscrewed all of the screws, unclip the wires from the bottom plastic shell piece from the circuit boards and set the shell aside. This will prevent you from losing all of the screws in the plastic shell and having them fall all over the place.
Step 3
The side you opened should contain the battery. It will have a yellow clip at the end of it that connects through the center of the hoverboard into a wire that goes to the motherboard.
Unplug the battery.
Step 4
Now, if you are replacing the gyroscope on the side with the battery, then you do not need to unscrew the other side's bottom shell piece. If you need to replace that side, then go ahead and unscrew it all now.
Step 5
On the side where you're replacing the hoverboard gyroscopes, you can now unplug all of the clips from the gyroscope sensor itself. There are usually 3 clips in total, but if your hoverboard has extra features such as fancy LED lights, then there may be additional clips to detach.
Note: Sometimes there is a set of wires that go underneath a cage that surrounds the hoverboard battery. You may have to unscrew the 4 screws around the battery to be able to free this set of wires so that you can remove the clip.
Step 6
Once you've detached all of the clips that go into the gyroscope sensor you're replacing you'll want to grab your screwdriver again. Unscrew the 4 screws from on top of the gyro balance sensor and remove it.
Step 7
After removing the old gyroscope it is wise to compare it to your replacement hoverboard gyroscope sensor to make sure that it is correct. A lot of times the white clips will be different sizes (narrow vs wide clips) and will not fit. Now is the time to make sure you have purchased the correct gyroscope sensor.
Step 8
Once you've ensured that your clips are the same you will want to place your gyroscope into the now empty slot.
Important: Make sure to install your gyroscope sensor in the correct direction! The single white clip or set of wires that come off of the gyro sensor board should be facing inward, while the set of multiple white sockets should be on the outer edge. In the picture below, you will see the difference.

Step 9
The final step in replacing hoverboard gyroscope sensors is to put everything back together. Screw all 4 small screws back into the gyroscope, reconnect all of the clips and wires, plug your battery back in, and then put your plastic shell back on and screw it in too.
If You Still Have Hoverboard Problems...
If replacing your gyroscopes didn't work, then there may be another problem with your hoverboard. We recommend that you diagnose the problems by reading our definitive guide to hoverboard red light flashing and if that doesn't help, then you may always take advantage of our hoverboard repair service.
Hoverboard Gyroscope Repair Video